2
2
G-W LTI 1.3 Setup for Schoology
Schoology Admin Adds G-W LTI Tool
1. Log in as an administrator
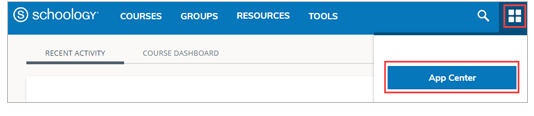
2. Select the "Apps Center".
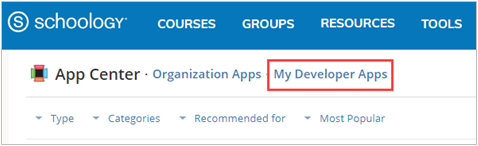
3. Select "My Developer Apps".
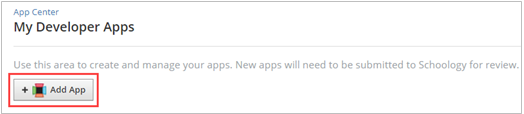
4. Select "Add App".
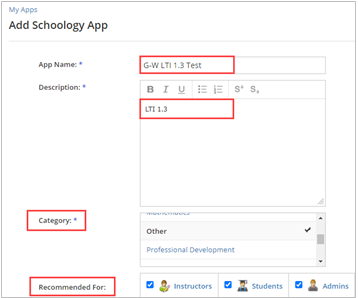
5. Fill out the required fields: App Name, Description, Category, Recommended for, etc.
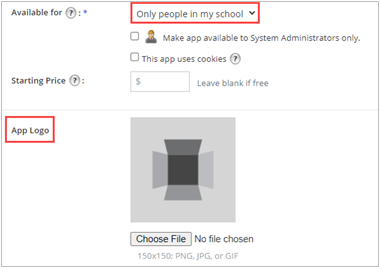
6. Next to Available for select "Only people in my school" from the drop-down menu. Add a logo.
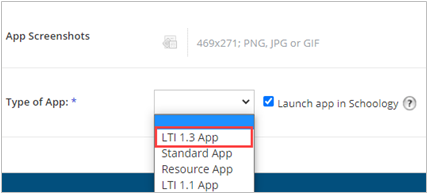
7. Next to Type of App, select "LTI 1.3 App"
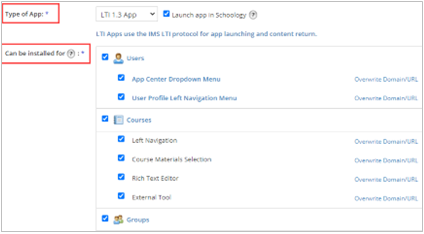
8. Checkmark where users will be able to access the app.
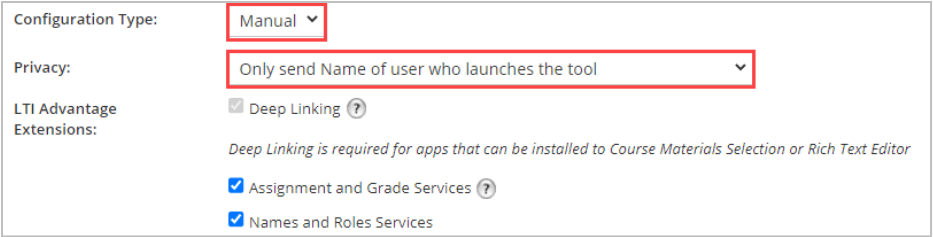
9. Next to Configuration Type, select "Manual". Next to Privacy, G-W prefers to see "Only send Name of user who launches the tool". Next to LTI Advantage Extensions, choose which you want the App to use.
10. Enter the following information into the fields. Enter the JWKS URL and not the Tool Public Key.
Tool Public Key: Leave blank
JWKS URL: https://www.g-wonlinetextbooks.com/api/lti/jwks
Domain/URL: https://www.g-wonlinetextbooks.com
Custom Parameters: Leave blank
OIDC Login Init URL: https://www.g-wonlinetextbooks.com/api/lti/authorize-redirect
Redirect URL: https://www.g-wonlinetextbooks.com/api/lti/access

11. Check "This application meets the Schoology Terms of Use" and select "Save Changes".
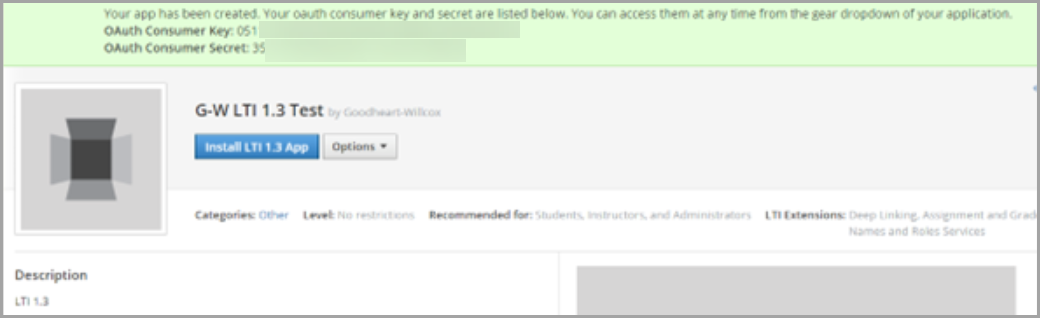
12. A window containing your Schoology OAuth Consumer Key and OAuth Consumer Secret will pop up. Copy and paste this information into a document and save it. G-W will need this information to complete your registration.
Configure the Client ID
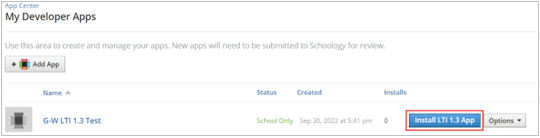
13. Navigate to the Schoology Apps page (App Center>My Developer Apps) and select “Install LTI 1.3 App.”
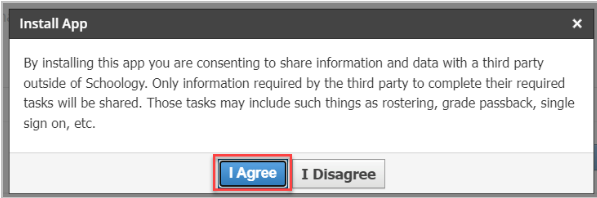
14. A dialogue box will appear. Select “I Agree.”
15. Another dialogue box will appear. Select “Continue”.

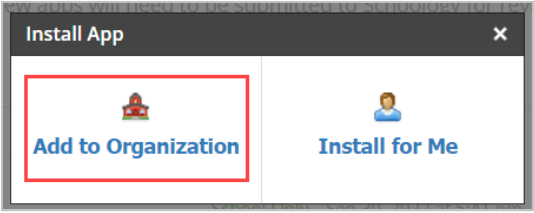
16. On the next dialogue box, select “Add to Organization”.
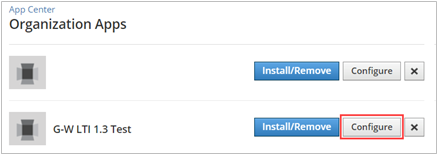
17. Select App Center then select "Organization Apps".

18. Next to the added G-W LTI 1.3 app, select "Configure".
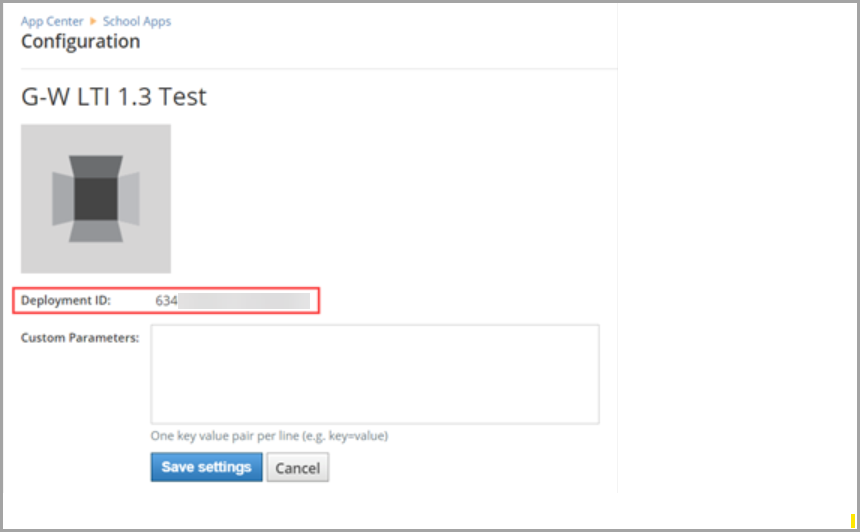
19. A window containing your Schoology Deployment ID will appear. Copy and paste this information into a document and save it. G-W will need this information to complete your registration. Select "Save Settings".
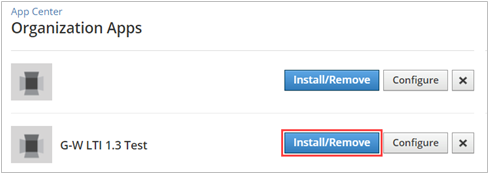
20. Select the "Install/Remove" button.
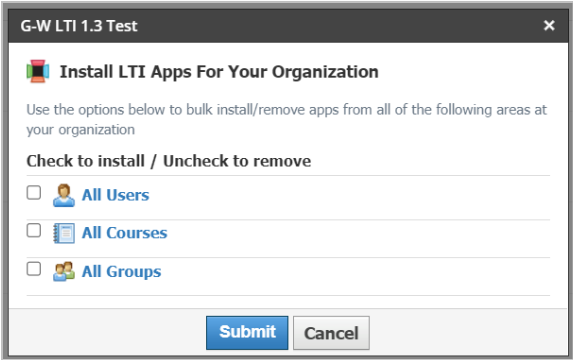
21. Select the options below to bulk install/remove apps from all of the following areas at your organization. Then select "Submit".
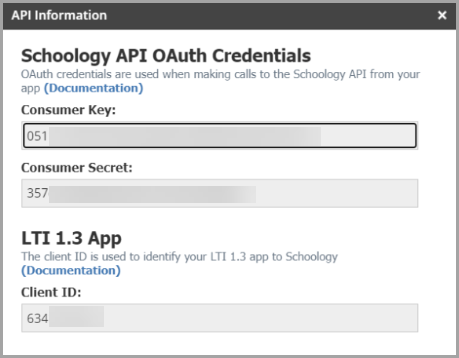
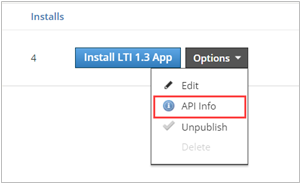
22. Go back to App Center to view the G-W LTI 1.3 app. Select "Options" and then select "API Info".
23. A dialogue box will appear. Copy and paste this information (Consumer Key, Consumer Secret, and Client ID) into a document and save it. G-W will need this information to complete your registration.